
How to Prepare DTF Print Files: Avoiding Semi-Transparencies, Fine Lines, and Heavy Ink Feel
Ever wondered why some DTF prints feel heavy and plastic-like, while others fade around tiny graphic details or leave ugly white specks? Most DTF printing defects aren't caused by the printer—they start in the design file. In this comprehensive guide, we break down essential file preparation rules, including handling opacity, minimum line weights, and knock-out transparency techniques to guarantee soft, vibrant, and durable transfers every time.
Quick Summary: Core Rules for DTF File Preparation
- No Semi-Transparency or Drop Shadows: DTF RIP software automatically places a 100% solid white ink layer under any pixel above 0% opacity. Faded edges or drop shadows will result in harsh white outlines.
- Minimum Line Thickness: Keep all positive lines at at least 0.5 mm (approx. 2–3 pixels at 300 DPI) so adhesive powder has enough surface area to bond.
- Avoid Large Solid Color Blocks: Use "knock-out" transparency (rasterization) to let the garment fabric show through. This dramatically improves fabric breathability and eliminates the "heavy plastic" hand-feel.
- File Format & Resolution: Export as transparent PNG or TIFF at 300 DPI in sRGB or CMYK color space.
1. The Semi-Transparency & Drop Shadow Trap
The most common mistake graphic designers make when switching from DTG (Direct-to-Garment) to DTF printing is using semi-transparent gradients, glowing halos, or soft drop shadows.
Why Semi-Transparency Fails in DTF:
Unlike DTG printers that can drop faint semi-transparent ink directly onto fabric, DTF printers must lay down a solid white ink underbase behind the color layer to hold TPU adhesive powder. If a design has a 20% transparent glowing edge, RIP software will still print a solid white base under it, creating an unwanted, chalky white border around your graphic.
How to Fix It: Use half-toning (dots) or hard vector edges instead of soft gradient fades to black/transparent background. Ensure all design edges are 100% solid pixels or completely transparent.
2. Minimum Line Weights for Long-Lasting Washability
Fine text and delicate line art look stunning on screen, but if lines are too thin, they won't hold enough hot-melt powder to bond permanently with garment fibers during heat pressing.
DTF Artwork Specifications & Threshold Limits
| Design Element | Minimum Recommended Size | Risk if Too Small |
|---|---|---|
| Positive Lines (Solid Art) | 0.5 mm / 0.02 inches (or 6pt font) | Line will peel off after 1–2 washes |
| Negative Space (Cutouts) | 0.7 mm / 0.03 inches | Powder bridges gap, filling in holes |
| Image Resolution | 300 DPI at 100% print size | Blurry edges and pixelated white borders |
| Color Mode | sRGB or CMYK with embedded ICC profile | Color shift between monitor and print |
3. How to Eliminate the "Heavy Plastic" Feel on T-Shirts
Large, solid square prints (like a giant 12x12 inch solid photo block) apply a thick layer of ink and TPU film onto the shirt. This creates a heavy, non-breathable print that feels like a stiff piece of plastic against the chest.
Pro Techniques for Soft-Hand DTF Transfers:
- Knock Out Shirt Colors: If printing a design on a black shirt, use Photoshop or Illustrator to knock out (delete) all black areas from the design file. The black fabric of the shirt fills in the color naturally, using 30–50% less ink and powder while making the print vastly softer.
- Rasterization & Halftoning: Convert solid backgrounds into micro-dots or fine line patterns. This breaks up continuous ink films, allowing air to pass through the garment for maximum breathability and a retail-ready soft hand feel.
4. Step-by-Step File Export Checklist in Photoshop / Illustrator
- Step 1: Check Background Transparency: Ensure the background is 100% transparent (no hidden white background layer).
- Step 2: Clean Stray Pixels: Use the Magic Wand tool or Layer Mask to delete faint, dirty pixels around the artwork perimeter.
- Step 3: Set Canvas to 300 DPI: Always design at the actual physical print size (e.g., 30cm x 40cm) at 300 Dots Per Inch. Do not simply up-sample a 72 DPI web image.
- Step 4: Save as PNG-24 or Uncompressed TIFF: Save your file with transparency enabled to ensure clean import into RIP software like FlexiPrint or MainTop.
Frequently Asked Questions (FAQ)
Can I print 72 DPI low-resolution internet images using DTF?
No. Low-resolution images have blurry pixelated edges. Because DTF RIP software creates a sharp white underbase layer, low-res images will produce jagged, pixelated white halos around your print on dark shirts.
Why does my DTF print have a white outline around the edges?
White outline bleeding happens when either the printhead alignment (choke setting) in RIP software is set incorrectly, or the graphic file contains soft semi-transparent pixels along the outer edges.
How do I make DTF prints feel as soft as Screen Printing?
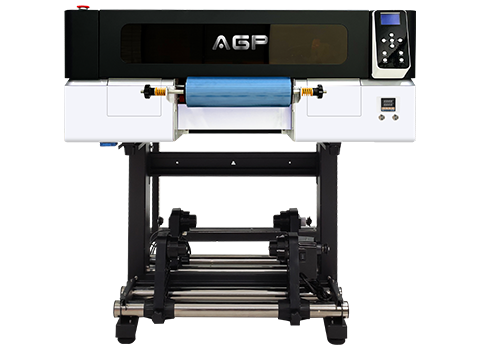
By using rasterized artwork (knocking out shirt colors), choosing fine-grain premium TPU powders, and using high-quality DTF equipment with precise RIP ink control (like AGP DTF Printers).
Achieve Flawless DTF Prints with AGP Technology
Great prints start with great designs and industrial-grade machinery. AGP printers and RIP color management software deliver razor-sharp detail, soft-touch transfers, and flawless color reproduction for every job.
Get AGP Equipment Pricing & Sample Kit