
A Comprehensive Guide on the Importance of DTF Color Management
Poor DTF color results — dull prints, color shift between screen and fabric, white halo around designs — are caused by incorrect workflow setup, not bad ink. 90% of DTF color problems trace back to three root causes: an uncalibrated monitor, a missing or wrong ICC profile, and incorrect RIP settings (especially white ink and ink limit).
The fix follows a fixed sequence: (1) calibrate your monitor with a hardware colorimeter; (2) linearize your printer channel by channel before building any profile; (3) install an ICC profile matched to your specific printer + ink + film combination; (4) configure RIP parameters — resolution 1440×1440 dpi, total ink limit 220–280%, white choke 3–5%; (5) run a test swatch before every production batch.
DTF printing is capable of exceptionally vibrant, accurate color reproduction — but only when the color management workflow is properly set up. This guide walks through each step with specific parameters so you can diagnose problems systematically and prevent them from recurring.
Why DTF Color Goes Wrong: The Root Causes
DTF color management has one complication that most other print processes do not: the white ink underbase. Every other color management principle — ICC profiles, linearization, gamut mapping — interacts with the white channel. Understanding this changes how you approach every other setting.
In DTF, the print sequence on PET film is: white underbase first, then CMYK on top (for dark fabrics) — or CMYK only (for light fabrics). When the white layer is wrong, every color sitting on top of it is also wrong. No ICC profile can compensate for an incorrectly set white channel.
The five most common DTF color problems
| Problem | What it looks like | Most likely cause | First fix to try |
|---|---|---|---|
| Dull / washed out | Colors look faded on dark fabric after transfer | Insufficient white ink density, or ink limit too low | Increase white ink opacity in RIP; raise total ink limit toward 250% |
| Color shift | Screen shows bright red; fabric shows orange-red | Uncalibrated monitor or wrong ICC profile | Calibrate monitor with colorimeter; update output ICC profile in RIP |
| White halo / fringing | White border visible around the design edge | White underbase extends beyond color layer | Apply white choke of 3–5% in RIP white ink settings |
| Ink bleeding | Design edges blurry; ink spreads outside print area | Total ink limit too high, or humidity too high | Reduce total ink limit; check room humidity (target: 40–60%) |
| Inconsistent batch to batch | Same file prints differently across runs | Linearization drift; new ink or film batch | Re-linearize all channels; rebuild ICC profile for new consumable lot |
DTF Color Management: Step-by-Step Setup
1
Calibrate Your Monitor
Monitor calibration is the foundation of the entire workflow. If your screen is displaying colors inaccurately, every decision you make downstream — editing, proofing, approving — is based on wrong information. No amount of RIP tuning corrects for an uncalibrated display.
- Use a hardware colorimeter — software-only calibration is insufficient. Common options: X-Rite i1Display Pro, Datacolor Spyder X.
- Calibrate to a D65 white point (6500K) and gamma 2.2 — the standard for print work.
- Use software such as DisplayCAL to generate and install a monitor ICC profile automatically.
- Recalibrate every 4–6 weeks — monitor phosphors drift over time.
- Work in consistent ambient lighting: colour-critical comparison between screen and print requires the same light source every time. Aim for D50 (5000K) viewing conditions when checking prints against screen.
Soft proofing: Once your monitor ICC profile and printer ICC profile are both installed, enable soft proofing in Photoshop or Illustrator (View → Proof Colors → select your DTF output profile). This simulates the final print on your calibrated screen before you send a single job to the printer.
2
Linearize Your Printer — Before Anything Else
Linearization is the most commonly skipped step in DTF color management, and the most commonly misdiagnosed problem. It is not the same as an ICC profile. Linearization calibrates each ink channel so that a 50% input value produces 50% ink density on the film — a straight-line relationship between digital value and physical output. Without this baseline, your ICC profile is being built on a crooked foundation.
- In your RIP software, navigate to the linearization / density calibration tool.
- Print the RIP's linearization target — typically a 21-step gray ramp plus CMYK and white blocks.
- Measure the printed target with a spectrophotometer (e.g. X-Rite i1Pro).
- Import the measurements back into the RIP to generate correction curves.
- Calibrate each channel separately: C, M, Y, K, and White each need their own linearization curve.
Recalibration schedule Every 1–2 weeks under normal production
Immediately when switching to a new ink batch or new PET film lot
After any printhead maintenance (cleaning cycle, head replacement)
Whenever you notice gradual color consistency decline across runs
Immediately when switching to a new ink batch or new PET film lot
After any printhead maintenance (cleaning cycle, head replacement)
Whenever you notice gradual color consistency decline across runs
Never build or commission an ICC profile before completing linearization. Profiles built on an unlinearized printer embed the printer's errors into the profile — when you re-linearize later, the profile becomes wrong and needs to be rebuilt from scratch.
3
Install and Assign an ICC Profile
An ICC (International Color Consortium) profile is a data file that describes how your specific printer, with your specific ink, on your specific PET film, reproduces color. It acts as a translator between the color values in your design file and the ink droplets the printer must lay down to achieve those colors on fabric.
Where to get an ICC profile
- From your printer manufacturer or ink supplier — most will provide a generic profile for your printer model and ink set. This is the right starting point.
- From your RIP software — AcroRIP, Cadlink Digital Factory, and Wasatch include preset profiles for popular DTF printer configurations.
- Custom-built using a spectrophotometer — the most accurate option. Print an IT8.7/3 or ECI 2002 color target, measure it with a spectrophotometer, and generate a custom profile using software like i1Profiler or ProfileMaker. This profile is specific to your exact setup and compensates for every variable unique to your workflow.
Installing and assigning the profile
- Windows: Right-click the .icc or .icm file → Install Profile.
- Mac: Copy the file to /Library/ColorSync/Profiles/
- In your RIP software: import the profile into the profile library → create or edit a media configuration → assign the profile → set rendering intent → assign the configuration to your print queue.
Rendering intent — which to use Perceptual — best for photographs, gradients, skin tones. Compresses the full gamut smoothly; slight color shift acceptable in exchange for smooth transitions.
Relative Colorimetric — best for brand colors, logos, solid fills. Clips out-of-gamut colors rather than compressing them; most accurate for in-gamut colors.
Saturation — use only for bold graphics or signage where maximum punch matters more than accuracy.
Relative Colorimetric — best for brand colors, logos, solid fills. Clips out-of-gamut colors rather than compressing them; most accurate for in-gamut colors.
Saturation — use only for bold graphics or signage where maximum punch matters more than accuracy.
Critical: Your ICC profile must be built with your white underbase settings locked in. The white channel affects every color that sits on top of it. If you change white ink density or underbase settings after building the profile, the profile is no longer valid for that configuration — rebuild it.
4
Configure RIP Settings
The RIP (Raster Image Processor) sits between your design file and the printer. It handles color conversion, white channel logic, ink limits, resolution, and print queue management. A standard print driver cannot replicate these functions — for DTF, a proper RIP is not optional.
Core RIP parameters
Resolution (DPI) 1440 × 1440 dpi — standard for most apparel prints; best balance of quality and speed
2880 × 1440 dpi — fine detail, small text, photographic images
1200 × 1200 dpi — faster production for bold, simple designs
Avoid 720 dpi — edges will appear jagged on most artwork
2880 × 1440 dpi — fine detail, small text, photographic images
1200 × 1200 dpi — faster production for bold, simple designs
Avoid 720 dpi — edges will appear jagged on most artwork
Total ink limit Target range: 220–280% (sum of all CMYK channels)
Below 220% → dull, undersaturated prints
Above 280% → ink bleeding, slow drying, film saturation issues
Start at 250% and adjust based on test swatches
Below 220% → dull, undersaturated prints
Above 280% → ink bleeding, slow drying, film saturation issues
Start at 250% and adjust based on test swatches
White ink settings Dark fabrics: enable white underbase flood fill + CMYK on top
Light fabrics: disable white channel entirely to save ink
White choke: 3–5% — shrinks the white layer inward to prevent visible halo at design edges
White opacity: increase if colors appear dull after pressing; decrease if transfer feels stiff
Light fabrics: disable white channel entirely to save ink
White choke: 3–5% — shrinks the white layer inward to prevent visible halo at design edges
White opacity: increase if colors appear dull after pressing; decrease if transfer feels stiff
Print mode Print direction: bi-directional (faster, no quality loss for DTF)
Ink drop size: 3–5 pl (matches DTF nozzle architecture; larger = bleeding risk)
Screening: 20–28 LPI (textile standard; no visible dot pattern)
Pass count: 4-pass for standard jobs; 6–8 pass for high-precision or fine-detail work
Edge smoothing: enable (1–2 px) to reduce jagged edges on curves and fine lines
Ink drop size: 3–5 pl (matches DTF nozzle architecture; larger = bleeding risk)
Screening: 20–28 LPI (textile standard; no visible dot pattern)
Pass count: 4-pass for standard jobs; 6–8 pass for high-precision or fine-detail work
Edge smoothing: enable (1–2 px) to reduce jagged edges on curves and fine lines
Black generation Use UCR (Under Color Removal) to reduce ink usage and avoid muddy, over-inked blacks
Enable gray balance to adjust C/M/Y ratio — aim for equal channel values for neutral grays
Enable gray balance to adjust C/M/Y ratio — aim for equal channel values for neutral grays
RIP software options
| RIP Software | Common use case | Key strengths for DTF |
|---|---|---|
| AcroRIP | Asian-market DTF hardware; often bundled with printers | DTF-mode presets, white channel controls, ICC management |
| Cadlink Digital Factory | North American market; professional shops | Strong ICC workflow, extended gamut support, white handling |
| Wasatch SoftRIP | Signage background; increasingly common in DTF | Detailed color management controls, spectral profiling |
| PrintFactory | High-end production environments | Spectral profiling support, precise ink control |
| Flexi | Sign and print shops transitioning to DTF | Familiar to wide-format users; solid ICC integration |
5
Test Swatch Before Every Production Run
Color management settings create the conditions for consistent output — but the test swatch is what confirms they are actually working before you commit to a production batch. It takes five minutes and prevents wasted film, ink, and transfer time.
- Print a standardized test image that includes: skin tones, neutral grays, a near-black, a near-white, and any brand-specific colors you frequently reproduce.
- Press the transfer onto a scrap garment of the same base color you will use in production.
- Compare the pressed output against your calibrated monitor using soft proofing, under D50 viewing conditions if available.
- If colors are off: identify whether the shift is in a specific channel (e.g. cyan too strong → pull back C channel in RIP curve) or across the board (profile needs updating).
- Record your settings: note the RIP configuration, ink batch number, and film lot for every test. When a problem occurs, you have a reference to compare against.
Gang sheet tip: For high-volume shops, place one test strip at the edge of every gang sheet. If that strip is correct, the rest of the sheet will be consistent. This adds almost no cost but catches drift before it ruins an entire run.
Color Spaces in DTF: RGB, CMYK, and LAB
Understanding which color space to use at each stage of the workflow prevents the most common source of color shift — incorrect color space handling during file handoff to the RIP.
| Color Space | Where it lives | What to do |
|---|---|---|
| sRGB | Your design file / artwork source | Design in sRGB. Widest compatibility with design software; the RIP converts to CMYK at print time using the ICC profile. Designing in CMYK narrows your gamut unnecessarily. |
| Adobe RGB | Photographers / wide-gamut workflows | Acceptable as a source space if your monitor and workflow support it. Adobe RGB has a wider gamut than sRGB — useful for highly saturated colours. Embed the profile in the file so the RIP can read it correctly. |
| CMYK (ISO Coated v2 / SWOP) | Output / RIP conversion | Let the RIP handle the RGB → CMYK conversion using your ICC profile. If you must deliver a CMYK file (e.g. from a client), import it into the RIP with the correct source CMYK profile assigned. |
| LAB | Color profiling / measurement | LAB is the device-independent space used internally by ICC profiles. You do not design in LAB; it is the mathematical bridge the profiling software uses to translate between your source space and your printer's ink values. |
If your design software has color management enabled AND your RIP also has color management active, they can conflict — applying two ICC profile conversions in sequence and shifting colors dramatically. When using a RIP, turn off color management in your design software (set it to "No Color Management" or "Pass Through") and let the RIP handle all conversion.
Environmental Conditions That Affect DTF Color
Even a perfectly calibrated and profiled workflow can produce inconsistent output if the printing environment is outside the recommended range. Temperature and humidity affect ink viscosity, drying speed, and the curing behaviour of the hot-melt powder — all of which influence how color appears on the final transfer.
Target printing environment Temperature: 20–25°C (68–77°F)
Humidity: 40–60% RH
Below 18°C (64°F): inks thicken → poor saturation, uneven dot placement, increased clog risk
Above 30°C (86°F): inks thin → faster bleeding, reduced density, colour shift toward lighter tones
High humidity (>65%): slow drying, ink spread, adhesive powder clumping
Low humidity (<35%): static buildup on film, dust attraction, uneven ink laydown
Humidity: 40–60% RH
Below 18°C (64°F): inks thicken → poor saturation, uneven dot placement, increased clog risk
Above 30°C (86°F): inks thin → faster bleeding, reduced density, colour shift toward lighter tones
High humidity (>65%): slow drying, ink spread, adhesive powder clumping
Low humidity (<35%): static buildup on film, dust attraction, uneven ink laydown
If your shop environment fluctuates significantly across seasons, build separate ICC profiles and linearization curves for summer and winter conditions, or for morning vs. afternoon production. The alternative is to invest in climate control for the print area — consistent environment means consistent color.
Why DTF Color Management Matters for Your Business
Color management is not a technical exercise for its own sake. Every hour spent on proper calibration pays back in reduced waste, fewer reprints, and reproducible results that build customer trust.
- Fewer reprints. Color problems caught in a 5-minute test swatch cost one swatch. Color problems caught after pressing 50 transfers cost ink, film, powder, time, and a garment.
- Brand color accuracy. Clients with specific brand colors (Pantone references, corporate identity standards) need those colors to hit consistently across orders. A calibrated, profiled workflow makes this reproducible rather than accidental.
- Scalability. A shop that manages color by eye can produce acceptable results in small batches. A shop that manages color systematically can hand the workflow to any operator and get the same output — essential as production volume grows.
- Fabric versatility. Different fabrics absorb ink differently. A single ICC profile may work well for 100% cotton but shift noticeably on polyester blends. Substrate-specific profiles address this directly.
Frequently Asked Questions
Q: Why do my DTF prints look dull or washed out?
A: Dull DTF prints almost always come from one of three things: (1) insufficient white ink opacity — increase white ink density in your RIP; (2) incorrect or missing ICC profile — load a profile matched to your ink and film combination; (3) total ink limit set too low — the recommended range for DTF is 220–280%.
Q: What is the best color mode for DTF printing — RGB or CMYK?
A: Design in sRGB and let your RIP software handle the conversion to CMYK at print time. RGB has a wider gamut than CMYK, so designing in CMYK from the start limits your colours unnecessarily. Save files in sRGB format and assign the output ICC profile inside the RIP — not in your design software.
Q: How do I fix color shift between my screen and the printed DTF transfer?
A: Color shift has two main causes: (1) uncalibrated monitor — use a hardware colorimeter (X-Rite i1Display or Datacolor Spyder) to generate a display ICC profile; (2) wrong or outdated output ICC profile in the RIP — rebuild or replace the profile. Enable soft proofing in your design software to simulate the final print on your calibrated screen before printing.
Q: What causes white halo or fringing around DTF prints?
A: White halo appears when the white underbase extends slightly beyond the colour layer. Fix it by applying a choke of 3–5% in your RIP's white ink settings. This shrinks the white layer slightly inward relative to the CMYK layer so the white does not extend past the design edges.
Q: How often should I re-linearize my DTF printer?
A: Re-linearize every 1–2 weeks under normal production conditions, and always when switching to a new batch of ink or PET film. Linearization drift is one of the most common causes of gradual colour consistency decline — operators often attribute this incorrectly to ink quality when the real cause is the printer's density output drifting from its calibrated baseline.
Q: What RIP software is best for DTF color management?
A: The most widely used options are AcroRIP (common with Asian-market DTF hardware, often bundled with printers), Cadlink Digital Factory (strong ICC workflow and white channel controls), Wasatch SoftRIP (solid color management with detailed controls), and PrintFactory (high-end spectral profiling). All support ICC profiles and white channel separation — the best choice depends primarily on which software your printer hardware was designed to work with.
Conclusion
DTF color management is a workflow, not a single setting. The five steps — monitor calibration, linearization, ICC profile setup, RIP configuration, and test swatch verification — work together. Skipping any one of them makes the others less effective and makes problems harder to diagnose.
The most impactful change most DTF operators can make immediately is to run a linearization before building or using any ICC profile. The second most impactful is to calibrate the monitor. Both steps cost nothing beyond a spectrophotometer and thirty minutes of setup time — and they eliminate the majority of color problems that shops currently waste hours troubleshooting.
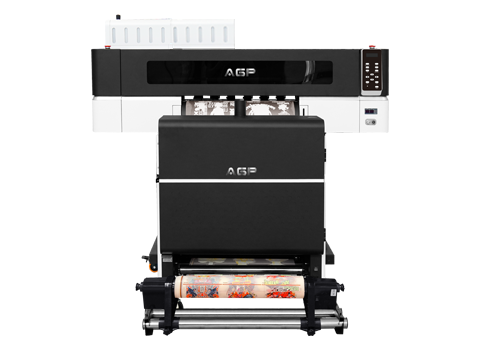
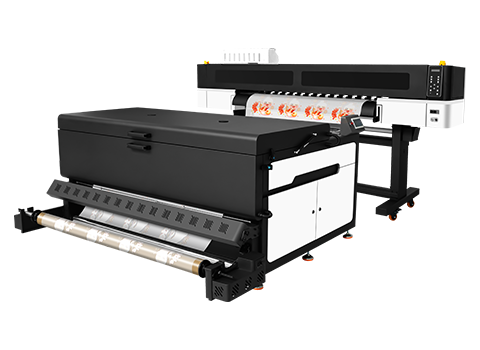
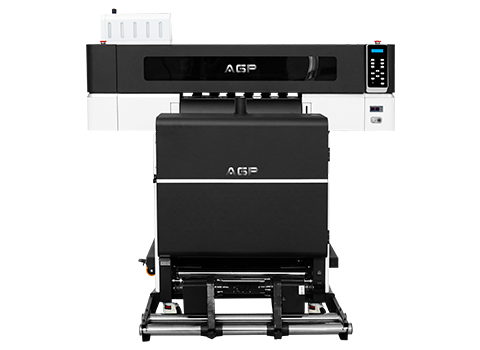
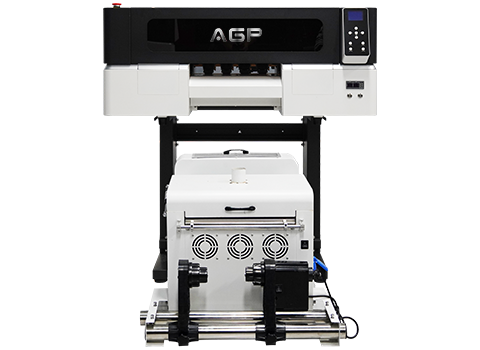
If you have specific questions about color management for AGP DTF printers or consumables, contact the AGP team for a setup recommendation tailored to your printer model and ink configuration.
Need DTF Ink and Film That Behaves Consistently?
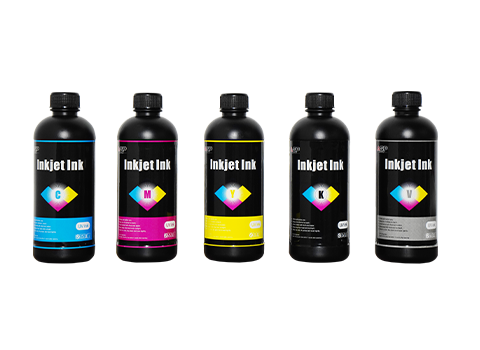
AGP DTF pigment inks are formulated for stable, predictable colour output across production runs. Available in matched sets for all AGP DTF printer models.
View AGP DTF Pigment Ink →