
How to Improve UV Ink Adhesion: 5 Methods with Specific Parameters
UV ink adhesion problems occur when ink is applied to low-surface-energy substrates (below 38 dynes/cm) without pretreatment, or when UV curing parameters are incorrect.
The most effective fixes are: (1) clean the substrate with IPA at 70%+ concentration; (2) raise surface energy via corona or plasma treatment to ≥38–44 dynes/cm; (3) apply a substrate-matched adhesion primer; (4) calibrate UV lamp power and print speed to achieve full through-cure; (5) match ink viscosity to substrate type and ambient temperature.
Getting UV prints to stick reliably across different materials is one of the most common challenges in UV printing. Whether you're printing on smooth plastics, glass, metals, or ceramics, adhesion failure — flaking, peeling, or smearing — comes down to a small set of controllable factors. This guide covers each factor with actionable parameters so you can diagnose and fix adhesion problems systematically.
Why UV Ink Adhesion Fails
UV ink adheres through three mechanisms: mechanical interlocking (ink flows into microscopic surface irregularities and cures), chemical bonding (reactive ink groups form bonds with the substrate), and molecular attraction (van der Waals forces provide additional hold on smooth surfaces). When any of these is compromised, adhesion fails.
The Three Root Causes
Low surface energy. Surface energy is the measure of a substrate's ability to bond with liquids. Materials with surface energy below 38 dynes/cm — such as untreated polypropylene (PP) and polyethylene (PE) — will cause UV ink to bead up rather than spread and bond. The quick test: drop a few water droplets on the surface. If they bead into a sphere, the surface is problematic. If they spread flat, adhesion is more likely to succeed.
Surface contamination. Oils from handling, dust particles, mold-release agents from manufacturing, and residual moisture all act as barriers between the ink and substrate — even on high-energy surfaces. A clean surface is the baseline before any other treatment.
Incorrect UV curing. UV ink that is under-cured remains soft and lacks the crosslinked structure needed for adhesion. Over-cured ink becomes brittle and chips at the edges. Neither extreme produces durable prints.
How to Improve UV Ink Adhesion: 5 Step-by-Step Methods
1
Clean the Substrate
Surface cleaning is the non-negotiable first step before any other treatment. Dirt, skin oils, dust, and moisture all prevent ink from bonding — even on substrates with good surface energy.
- Use isopropyl alcohol (IPA) at 70% concentration or higher. Lower concentrations contain too much water and leave moisture on the surface. Higher concentrations (90%+) also work and evaporate faster.
- Use a lint-free cloth only — paper towels leave fibres that interfere with ink contact.
- Wipe in one direction; do not rub back and forth (this can redistribute contamination).
- For porous materials (wood, uncoated paper, fabric-textured surfaces), allow 3–5 minutes for complete drying before printing. Residual moisture in pores causes bubbling and adhesion failure.
- Some 3D-printed substrates benefit from light sanding (400-grit) before IPA cleaning to increase mechanical interlocking.
- Caution: test IPA on sensitive substrates first — some coatings and painted surfaces can be damaged by alcohol.
Quick wetting test: After cleaning, place 2–3 drops of water on the surface. If they spread flat (contact angle <45°), the surface is ready. If they bead into a ball, the surface either has low surface energy or is still contaminated — repeat cleaning or move to Step 2.
2
Apply Surface Treatment: Corona or Plasma
For low-surface-energy substrates, cleaning alone is not enough. Surface treatment physically changes the substrate's molecular structure to increase surface energy and ink wettability.
Corona Treatment
Corona treatment uses high-voltage electrical discharge to oxidise the substrate surface, raising its surface energy and making it more receptive to UV ink. It is the most accessible option for in-house use.
Parameters Target surface energy after treatment: 38–44 dynes/cm (verify with dyne test pens/liquids)
Common substrates: PE, PP, PVC, PET, Nylon
Print within 24–48 hours of treatment — surface energy degrades over time as the material returns to its original state
Not effective on substrates with existing hydrophobic coatings
Common substrates: PE, PP, PVC, PET, Nylon
Print within 24–48 hours of treatment — surface energy degrades over time as the material returns to its original state
Not effective on substrates with existing hydrophobic coatings
Plasma Treatment
Plasma treatment uses ionised gas to modify the substrate at a molecular level, producing polar groups on the surface that dramatically improve UV ink bonding. It penetrates more deeply than corona treatment and is the preferred method for glass, ceramics, and complex-textured surfaces.
Parameters Best for: glass, ceramic, metal, and textured hard substrates
Produces more durable surface activation than corona — better for high-washability applications
Requires dedicated plasma equipment — not a DIY option; typically integrated into manufacturing workflows
Produces more durable surface activation than corona — better for high-washability applications
Requires dedicated plasma equipment — not a DIY option; typically integrated into manufacturing workflows
Flame Treatment
Passing an open flame briefly over a plastic surface raises its surface energy by oxidising the top layer. It is a flexible, low-cost alternative for many plastics and is commonly used for glass substrates prior to applying a primer.
Do not use flame treatment on substrates that are heat-sensitive, thin, or flammable.
3
Use a Substrate-Matched Adhesion Primer
Adhesion primers create a chemical bridge between the substrate and the UV ink. Primer molecules have dual functionality: one end bonds to the substrate surface, the other participates in the UV curing reaction, locking the ink in place. The key word is substrate-matched — primers are material-specific and using the wrong one provides little benefit.
- Glass / ceramics / tiles: Require dedicated glass or ceramic primer (silane-based coupling agents are common). These substrates almost always need primer regardless of surface energy.
- Metals (coated): IPA cleaning is often sufficient. Bare or lightly oxidised metals benefit from a metal primer.
- PP / PE plastics: Use low-surface-energy-specific primer after corona treatment for best results.
- Acrylic: Often requires primer. Test a clear/varnish underbase first — it adheres better than colour inks and creates a bondable layer.
Application method Apply primer to a lint-free microfiber cloth and wipe onto the print area — do not pour directly onto the substrate
Allow primer to fully evaporate before printing (typically 1–3 minutes depending on primer type)
Some primers are spray-applied — follow the manufacturer's specific instructions
Allow primer to fully evaporate before printing (typically 1–3 minutes depending on primer type)
Some primers are spray-applied — follow the manufacturer's specific instructions
Never apply primer to mirror-finish or highly reflective surfaces. These surfaces reflect UV light back toward the printhead, which can damage the lamp or cause uneven curing of the primer layer itself.
4
Calibrate UV Curing Settings
Even the best-prepared substrate with the right primer will fail if the UV curing is incorrect. UV ink must achieve through-cure — full polymerisation from the surface of the ink film all the way down to the substrate interface. Surface cure alone (the top layer is hard but the bottom layer is soft) is the most common cause of adhesion failure that isn't caught immediately after printing.
Diagnosing Under-Cure vs Over-Cure
- Under-cured: Rub the print with your thumb immediately after curing. If the ink smears or drags, the ink is under-cured. Fix: increase lamp power, reduce print speed, or check lamp condition.
- Over-cured: The print does not smear but chips or flakes off at edges or on flex. Fix: reduce lamp power or increase print speed. (Over-curing creates brittle crosslinks that fail under mechanical stress.)
- Interface failure: The print does not smear but peels off in a sheet. This is a surface preparation issue, not a curing issue — return to Steps 1–3.
Key curing parameters Lamp power: Higher power increases irradiance (W/cm²), driving UV energy deeper into the ink film for through-cure
Print speed: Slower speed increases dwell time (exposure duration) and total energy dose (J/cm²). Example: perfect adhesion at 1 m/s can fail if speed is increased to 1.5 m/s on the same job
Lamp condition: LED UV lamps degrade over approximately 20,000 hours of use. Dust on the lamp window can reduce irradiance by up to 30% — clean the quartz window regularly
Pinning (scanning printers): Use low-power pinning to freeze dot shape immediately, then high-power final cure to bond. Adjusting the pinning-to-cure ratio can dramatically improve adhesion on slippery substrates
Print speed: Slower speed increases dwell time (exposure duration) and total energy dose (J/cm²). Example: perfect adhesion at 1 m/s can fail if speed is increased to 1.5 m/s on the same job
Lamp condition: LED UV lamps degrade over approximately 20,000 hours of use. Dust on the lamp window can reduce irradiance by up to 30% — clean the quartz window regularly
Pinning (scanning printers): Use low-power pinning to freeze dot shape immediately, then high-power final cure to bond. Adjusting the pinning-to-cure ratio can dramatically improve adhesion on slippery substrates
Cross-hatch adhesion test (ASTM D3359): After curing, use a razor blade or craft knife to score a # pattern through the ink (approximately 1mm spacing). Press a strip of 3M 600 tape firmly over the scored area and peel it off at 180°. If no ink comes off with the tape, adhesion is good. If ink lifts in squares, the cure or surface prep needs adjustment.
5
Match Ink Viscosity to Substrate and Temperature
UV ink viscosity — its thickness and flow resistance — directly affects how well the ink wets the substrate surface and forms a bondable film. Viscosity is temperature-dependent: ink becomes thinner (lower viscosity) as temperature rises, and thicker (higher viscosity) as temperature drops.
- For optimal wetting: The surface tension of the ink must be lower than the surface tension of the substrate. If the ink's surface tension is higher, it will bead rather than spread.
- In warm environments: Ink becomes thinner and spreads more aggressively. Use a higher-viscosity ink formulation, or the ink may spread beyond the intended print area, thinning the ink film and reducing cure quality.
- In cold environments: Ink thickens and may not wet the surface properly, leading to poor adhesion even on well-prepared substrates. Ensure the printing environment is within the ink manufacturer's recommended temperature range.
- Flexible substrates: Choose ink formulations designed for flexibility. Rigid UV inks cure into a hard film that cracks when the substrate bends — use flexible UV ink for phone cases, decals, or soft-touch materials.
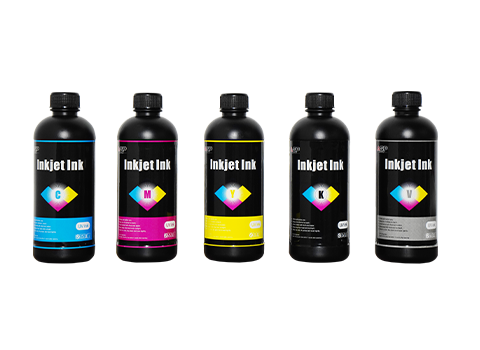
AGP UV Ink AGP UV inks are formulated with balanced viscosity for consistent wetting across a range of substrate types and ambient temperatures. Contact AGP for specific viscosity recommendations matched to your substrate and printer model.
UV Ink Adhesion by Substrate — Quick Reference
Use this table to identify the right pretreatment approach for your material before printing.
| Substrate | Surface Energy | Recommended Pretreatment | Primer Required? | Key Watch-Out |
|---|---|---|---|---|
| PP / PE (smooth plastic) | Low (<32 dyne/cm) | IPA clean → Corona treatment | Yes — low-surface-energy primer | Print within 24–48h of corona treatment |
| PVC / PET | Medium (32–38 dyne/cm) | IPA clean | Optional | Avoid plasticiser migration on flexible PVC |
| ABS / Polycarbonate | High (>38 dyne/cm) | IPA clean | Usually not needed | Good baseline adhesion; check for mould release agents |
| Flat glass | Medium | IPA clean → Flame treatment or Corona | Yes — glass-specific primer | Print on the air side, not the tin side (float glass) |
| Metal (coated / painted) | High | IPA clean | Optional (use metal primer for bare metal) | Bare metal may need light abrasion + primer |
| Acrylic (PMMA) | Medium | IPA clean | Yes — or use clear/varnish underbase | Static charge attracts dust — clean immediately before printing |
| Wood / MDF | Porous / variable | IPA clean → allow full drying (3–5 min) | Optional — white underbase recommended | Moisture in wood fibres causes bubbling; seal porous surfaces first |
| Ceramic / Tile | High (glazed surface) | IPA clean → Plasma treatment | Yes — ceramic-specific primer | Glaze surface can be chemically inert; plasma is more effective than corona here |
Frequently Asked Questions
Q: Why is UV ink not sticking to plastic?
A: Plastic substrates like PP and PE have surface energy below 32 dynes/cm. UV ink requires at least 38 dynes/cm to bond properly. Apply corona treatment to raise the surface energy before printing, then use a low-surface-energy primer for best results.
Q: How do I test UV ink adhesion?
A: Use the cross-hatch adhesion test (ASTM D3359): score a # pattern through the cured ink with a blade, apply 3M 600 tape firmly over the pattern, then peel at 180°. No ink lifting means good adhesion. For a faster check, rub the print with your thumb immediately after curing — if it smears, the ink is under-cured.
Q: Can I improve UV ink adhesion without corona treatment?
A: Yes. For many substrates — especially glass, metal, and acrylic — applying a substrate-specific adhesion primer with a lint-free cloth before printing is sufficient. Primer works without specialised equipment. On plastics like PP and PE, a primer alone may not be enough; corona or flame treatment is usually required to raise surface energy first.
Q: What causes UV ink to peel after curing?
A: The two most common causes are: (1) insufficient surface preparation — the substrate has low surface energy or surface contamination such as oils or dust; (2) incorrect UV curing — either under-cured (ink film soft, smears) or over-cured (ink film brittle, chips at edges). Run the smear test and cross-hatch test to identify which issue you have, then address the root cause in Steps 1–4 above.
Q: Does temperature affect UV ink adhesion?
A: Yes. UV ink viscosity, wetting behaviour, and curing efficiency all change with temperature. Cold environments slow polymerisation and can cause incomplete curing even with correct lamp settings. Warm environments thin the ink, which can cause spreading and a thinner ink film with weaker adhesion. Always print within the ink manufacturer's recommended ambient temperature range.
Q: Does UV ink work on all substrates?
A: No. Some substrates with hydrophobic coatings applied during manufacturing are designed to repel liquids — these may resist even aggressive surface treatments. Always run a small test print on a scrap piece before committing to a full print run on a new substrate.
Conclusion
Most UV ink adhesion problems trace back to one or more of the same causes: a substrate surface that isn't clean, isn't energetically prepared, or hasn't received the right primer — or a curing process that delivers too little (or too much) UV energy. Working through the five steps in this guide — cleaning, surface treatment, priming, curing calibration, and viscosity matching — gives you a systematic way to identify and fix any adhesion issue.
Before printing any new substrate at scale, run a small test print and perform a cross-hatch tape test. It takes five minutes and prevents a wasted batch.
If you have questions about which pretreatment or primer is right for your specific substrate and AGP UV printer model, contact our team for a recommendation.
Looking for UV Ink That Delivers Consistent Adhesion?
AGP UV inks are formulated for strong, durable adhesion across plastics, metals, glass, and more. Available for all AGP UV printer models.
View AGP UV Ink →